Tabla de Contenidos
Configuración inicial platformio en atom + esp8266
Materiales
1 Placa ESP 8266 1 Led 1 resistencia 1k 2 jumpers 1 cable usb para la conexión Esp al computador.
Los pasos a seguir
1. Configuración de el Ide que usaremos. 2. Configuración de equipo, instalación de drivers. 3. Puesta en marcha. Primero proyecto.
Primero se debe descargar Atom, el Ide con el cual trabajaremos para programar el Esp.
Hay dos caminos a seguir, para los que ya conocen Atom es solo ir a preferencias, luego a Install.
En la ventana que se nos despliega podemos simplemente escribir el paquete Platformio en el buscador y ahí podemos descargarlo y activarlo posteriormente.
Después de que Atom esta listo con su pluguin platformio. Pasamos a configurar el equipo para que reconozca la placa ESP. En este equipo estamos usando una copia de OSX thecapitan. Instalaremos entonces los drivers CH340.
Se puede ir a aqui para descargarlos o para descargarlos directamente haga click aqui
Despues de que la maquina reinicie pasaremos al paso final que es la comunicación del Ide con el ESP.
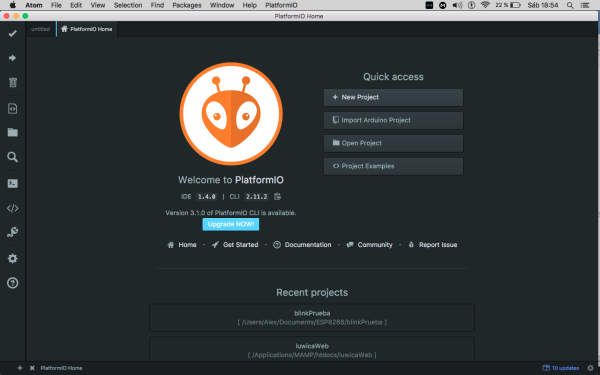
1. Primeros abrimos platformio.
Antes de iniciar cualquier proyecto nos asesoramos que el ESP si se esta reconociendo por el computador, haciendo click en este icono.
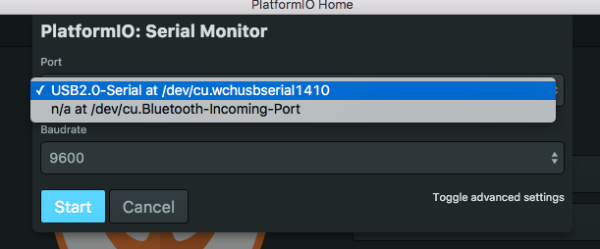
Nos saldrá una ventana emergente donde podremos escoger nuestra placa y elegir la velocidad con la cual vamos a trabajar.
En nuestro caso elegimos la placa USB2.0-Serial at /dev/cu.wchusbserial1410
y escojemos una velocidad de 115200
Cuando ya todo esta bien, pasamos entonces a crear el proyecto para empezar.
2. creamos un nuevo proyecto.
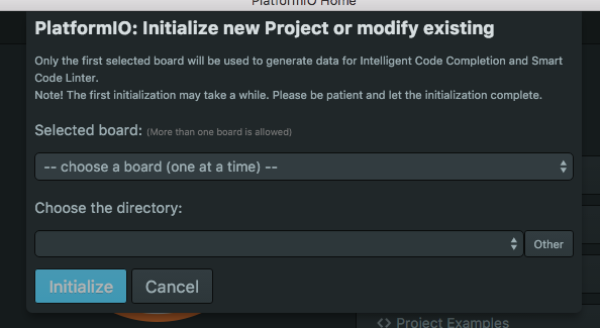
Cuando creamos el nuevo proyecto, platformio nos pedirá con que placa estamos trabajando pidiendo los datos en una ventana que sale.
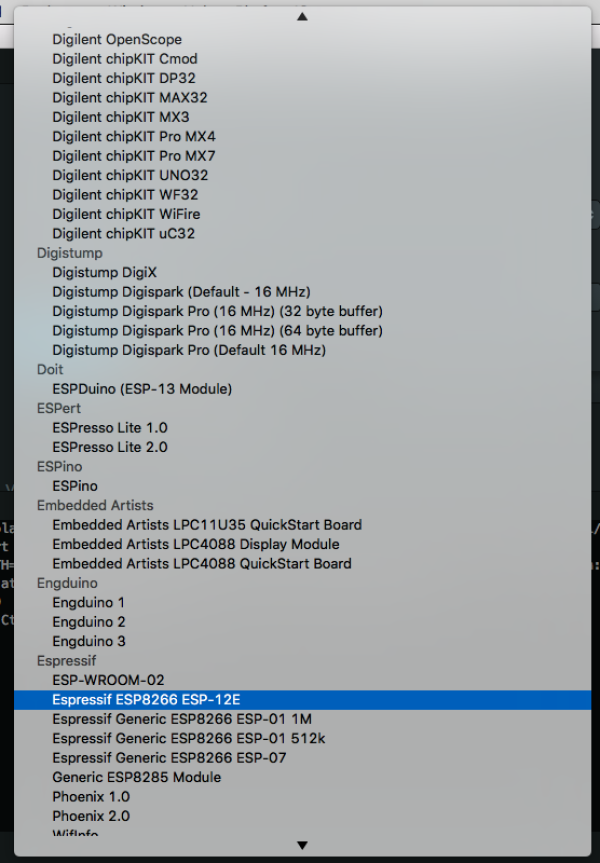
Nosotros trabajamos con esta versión del ESP8266.
foto esp
Y en el Ide escogemos esta opción de placa, marcada con azul.
Y finalmente creamos o elegimos un proyecto previamente creado donde almacenaremos nuestro primer ejemplo. Que en este caso será un blink con el ESP8266
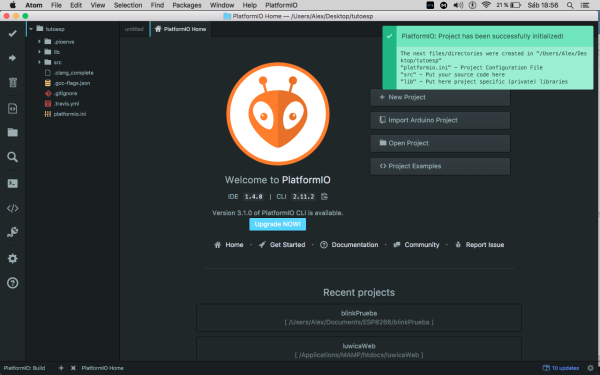
Si todo sale bien; Platformio nos dira que esta listo para empezar.
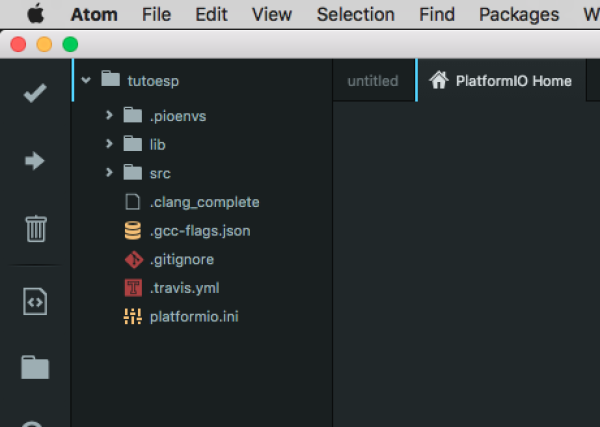
y nos creará un arbol de archivos.
Ahora lo que aremos será crear un archivo llamado blink.cpp dentro de la carpeta src que nos a creado Platformio.
Dentro de ese archivo que creamos, escribimos este código.
#include "Arduino.h"
#define pin 5

void setup() {
  pinMode(pin, OUTPUT);     // Initialize the LED_BUILTIN pin as an output
}

// the loop function runs over and over again forever
void loop() {
  digitalWrite(pin, LOW);   // Turn the LED on (Note that LOW is the voltage level
                                    // but actually the LED is on; this is because
                                    // it is acive low on the ESP-01)
  delay(1000);                      // Wait for a second
  digitalWrite(pin, HIGH);  // Turn the LED off by making the voltage HIGH
  delay(2000);                      // Wait for two seconds (to demonstrate the active low LED)
}
Debemos de tener algo asi parecido.
Para verificar que el código si esta correctamente escrito y no hay problemas de sintaxis, presionamos este icono.
Para pasar nuestro codigo al ESp apretamos este icono.
Es muy importante no olvidar que en el proceso de upload del codigo, se debe presionar el botón flash de ESP para que el código pueda pasar y es normal que se demore un poco la carga.
Ejemplo simple de uso remoto con ESP
Como encender un led con el esp 8266 + la aplicación blink
Toda la información inicia desde aqui http://www.blynk.cc/getting-started/
Seguiremos entonces trabajando con atom + platformio.
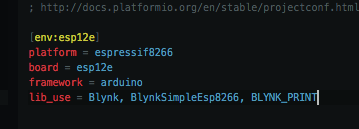
Despues de la configuración inicial que se hace en el ide y la placa ESP, usted debe ingresar en el platformio.init
las siguientes librerias
lib_use = Blynk, BlynkSimpleEsp8266, BLYNK_PRINT
Despues de esto, vamos a la opción src, en nuestro navegador de proyectos y escribimos el siguiente codigo:
/**************************************************************
 * Blynk is a platform with iOS and Android apps to control
 * Arduino, Raspberry Pi and the likes over the Internet.
 * You can easily build graphic interfaces for all your
 * projects by simply dragging and dropping widgets.
 *
 *   Downloads, docs, tutorials: http://www.blynk.cc
 *   Blynk community:            http://community.blynk.cc
 *   Social networks:            http://www.fb.com/blynkapp
 *                               http://twitter.com/blynk_app
 *
 * Blynk library is licensed under MIT license
 * This example code is in public domain.
 *
 **************************************************************
 * This example runs directly on ESP8266 chip.
 *
 * You need to install this for ESP8266 development:
 *   https://github.com/esp8266/Arduino
 *
 * Please be sure to select the right ESP8266 module
 * in the Tools -> Board menu!
 *
 * Change WiFi ssid, pass, and Blynk auth token to run :)
 *
 **************************************************************/


#define BLYNK_PRINT Serial    // Comment this out to disable prints and save space
#include <ESP8266WiFi.h>
#include <BlynkSimpleEsp8266.h>
#include <Arduino.h>


// You should get Auth Token in the Blynk App.
// Go to the Project Settings (nut icon).
char auth[] = "bb850ab7ac0f4e0c84665cb14a40f1bb";

// Your WiFi credentials.
// Set password to "" for open networks.
char ssid[] = "aqui escribo el nombre de mi wifi";
char pass[] = "aqui escribo la clave de mi wifi";

void setup()
{
  Serial.begin(115200);
  Blynk.begin(auth, ssid, pass);
}

void loop()
{
  Blynk.run();
}
En el codigo anterior vemos un script largo y raro, este es necesario para que la aplicación en el celular pueda comunicarse por medio del wifi con el ESP8266.
Para ello vamos e instalamos blynk en nuestro celular, despues de ello, nos logeamos, y creamos nuestro primer proyecto.
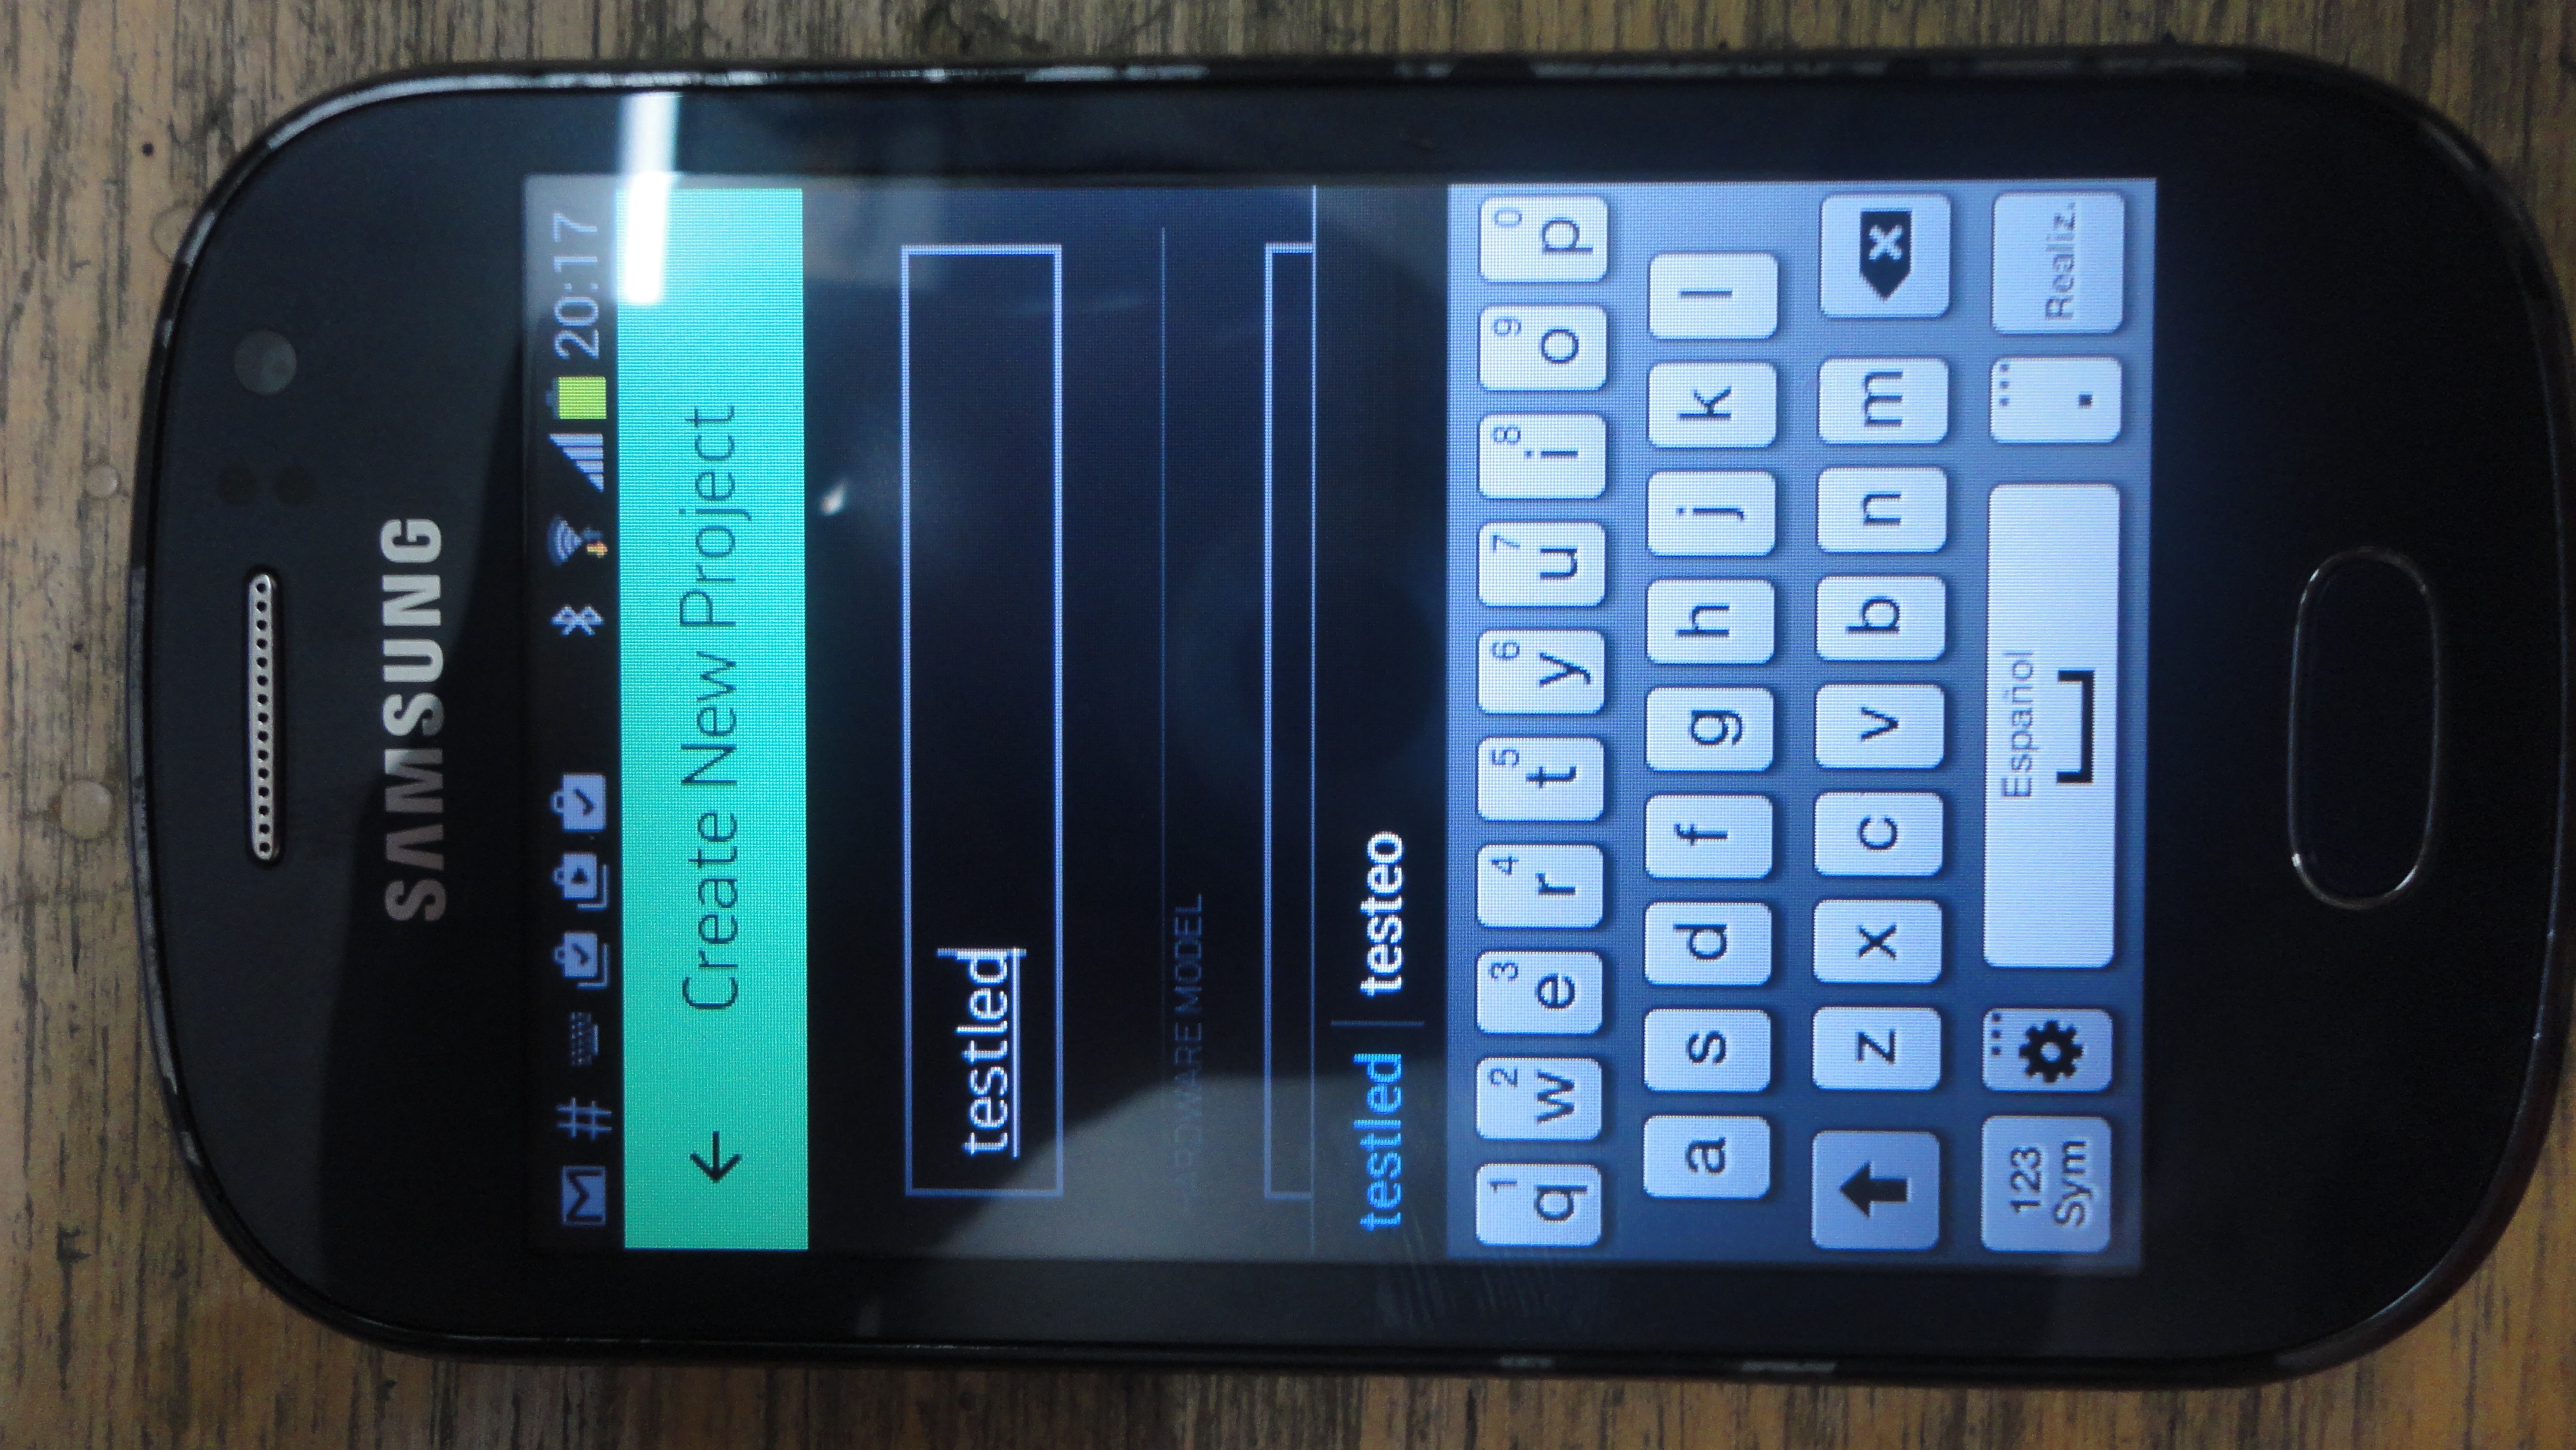
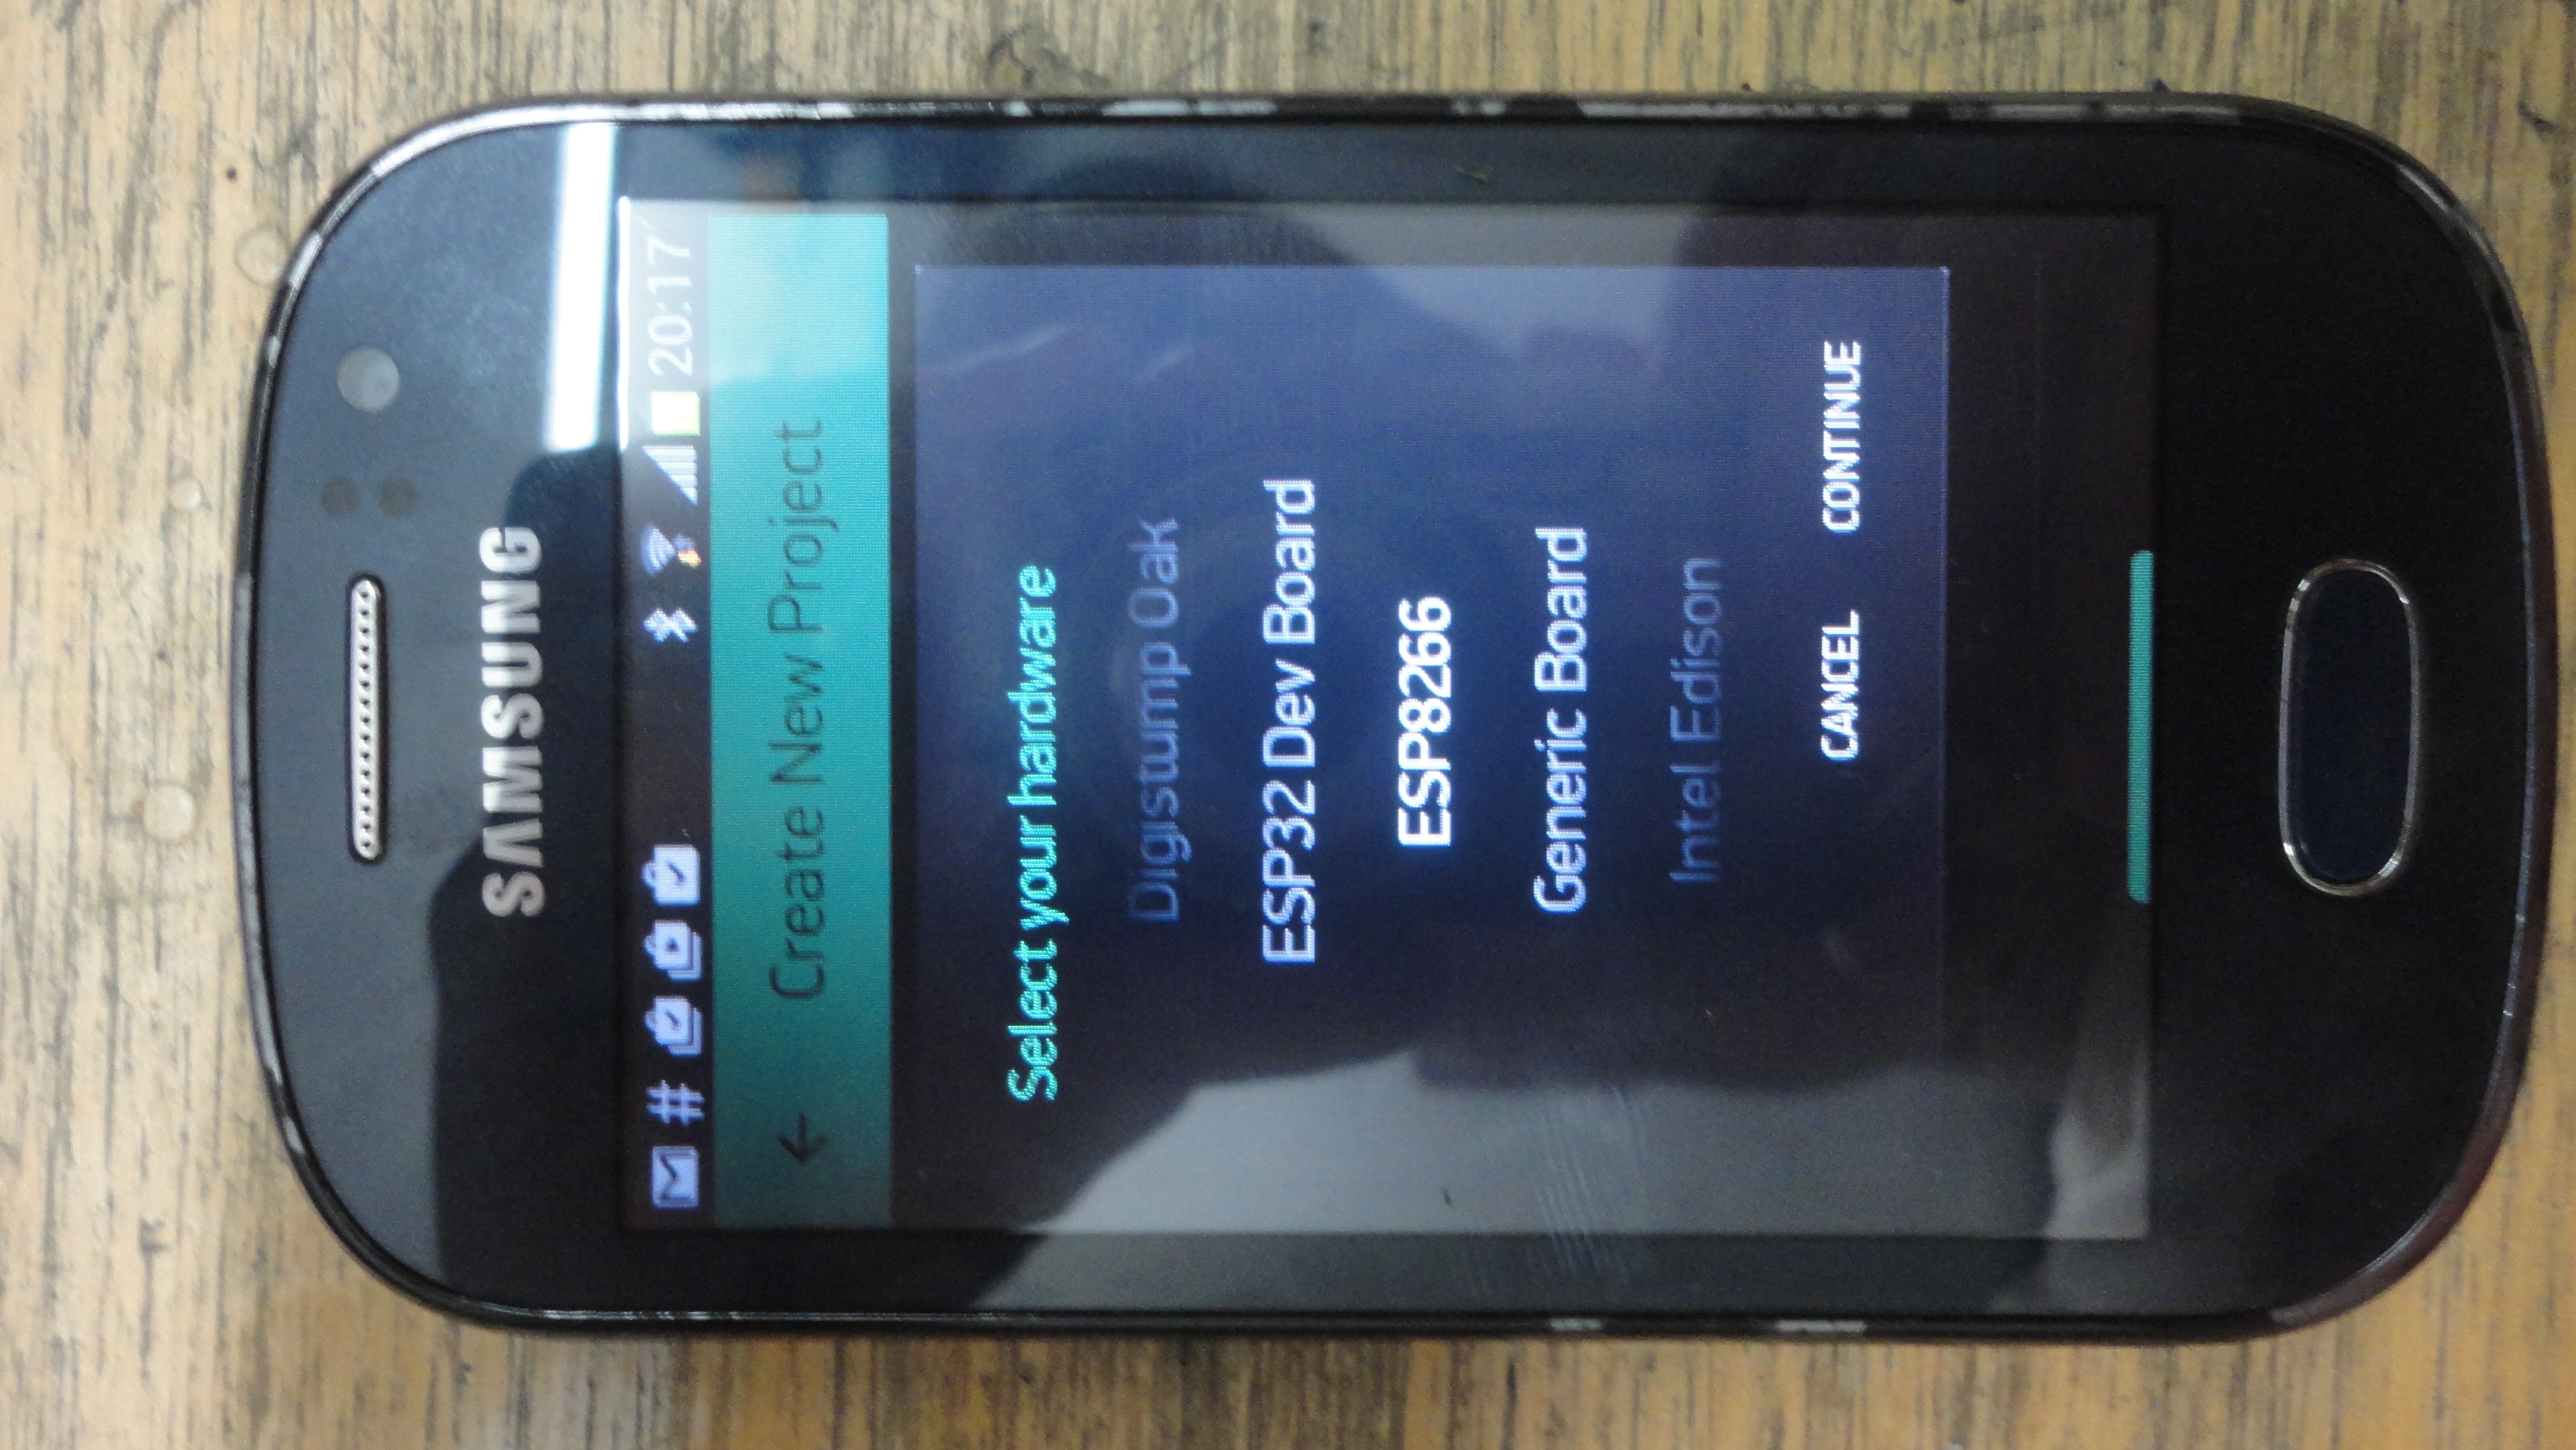
Lo nombramos, buscamos la placa y al final el proyecto generara un token, ese toquen puede ser invado a nuestro correo para anexarlo en el codigo.
Tras este paso, solo falta ingresar nuestro codigo a la placa, apretando el icono de la flecha de atom.
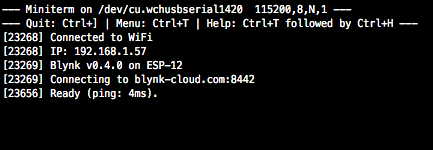
Cuando el proceso de subida haya finalizado, la consolo emitira un mensaje generando la ip donde esta conectado y realizando un ping
Despues de esto pasamos a nuestro celular. Abrimos blynk y simplemente abrimos el proyecto y arrastramos un boton, si nuestro led esta conectado en el pin GPI13, entonces en la aplicación elejimos un boton digital por el puerto 13.
y finalmente tenemos la aplicacion funcionando.
Aqui un video
Los componentes en blink poseen energia, cuando esa energia se agota la app pide comprar mas energia De esta forma desechamos la opción de blink y nos encontramos caminos mas interesantes.
Investigando esta opción.
http://androidcontrol.blogspot.com.co/2016/05/esp8266-wifi-control-relay.html
Simple led on off página incrustada en código
#include <ESP8266WiFi.h>

const char* ssid = "Your SSID";
const char* password = "Your password";

int ledPin = 13;
WiFiServer server(80);

void setup() {

  pinMode(ledPin,OUTPUT);
  digitalWrite(ledPin,LOW);

  Serial.begin(115200);
  Serial.println();
  Serial.print("Wifi connecting to ");
  Serial.println( ssid );

  WiFi.begin(ssid,password);

  Serial.println();
  Serial.print("Connecting");

  while( WiFi.status() != WL_CONNECTED ){
      delay(500);
      Serial.print(".");
  }


  Serial.println();

  Serial.println("Wifi Connected Success!");
  Serial.print("NodeMCU IP Address : ");
  Serial.println(WiFi.localIP() );

  server.begin();
  Serial.println("NodeMCU Server started");

  // Print the IP address
  Serial.print("Use this URL to connect: ");
  Serial.print("http://");
  Serial.print(WiFi.localIP());
  Serial.println("/");

}

void loop() {

    // Check if a client has connected
  WiFiClient client = server.available();
  if (!client) {
    return;
  }

  // Wait until the client sends some data
  Serial.println("Hello New client");
  while(!client.available()){
    delay(1);
  }

   // Read the first line of the request
  String request = client.readStringUntil('\r');
  Serial.println(request);
  client.flush();

   // Match the request

  int value = LOW;
  if (request.indexOf("/LED=ON") != -1)  {
    digitalWrite(ledPin, HIGH);
    value = HIGH;
  }
  if (request.indexOf("/LED=OFF") != -1)  {
    digitalWrite(ledPin, LOW);
    value = LOW;
  }

// Set ledPin according to the request
//digitalWrite(ledPin, value);

  // Return the response
  client.println("HTTP/1.1 200 OK");
  client.println("Content-Type: text/html");
  client.println(""); //  do not forget this one
  client.println("<!DOCTYPE HTML>");
  client.println("<html>");

  client.print("Led pin is now: ");

  if(value == HIGH) {
    client.print("On");
  } else {
    client.print("Off");
  }
  client.println("<br><br>");
  client.println("<a href=\"/LED=ON\"\"><button>Turn On </button></a>");
  client.println("<a href=\"/LED=OFF\"\"><button>Turn Off </button></a><br />");
  client.println("</html>");

  delay(1);
  Serial.println("Client disonnected");
  Serial.println("");

}
Cómo programar sensor AQA en rama AQAkit
pasos
En archivo main.ino
- Línea 21 Escribir el nombre del sensor
- Línea 397 Escribir latitud
- Línea 400 escribir longitud
En archivo aqawifi
- Línea 115 y 116 configuración de las credenciales del wifi
códigos websockets
Código websocket para led ON OFF
Este código fue tomado de: Enlace externo
Para usar este código se asigna la red al esp, y luego se debe de entrar al esp y entrar a la ip asignada por el esp para usar.
/*
 * configuration WebSocketServer_STA
 *
 * ESP8266 Web server with Web Socket to control an LED.
 *
 * The web server keeps all clients' LED status up to date and any client may
 * turn the LED on or off.
 *
 * For example, clientA connects and turns the LED on. This changes the word
 * "LED" on the web page to the color red. When clientB connects, the word
 * "LED" will be red since the server knows the LED is on.  When clientB turns
 * the LED off, the word LED changes color to black on clientA and clientB web
 * pages.
 *
 * References:
 *
 * https://github.com/Links2004/arduinoWebSockets
 *
 */

/*
#include <ESP8266WiFi.h>
#include <ESP8266WiFiMulti.h>
#include <WebSocketsServer.h>
#include <Hash.h>
#include <ESP8266WebServer.h>
#include <ESP8266mDNS.h>

static const char ssid[] = "-------";
static const char password[] = "-------";
MDNSResponder mdns;

static void writeLED(bool);

ESP8266WiFiMulti WiFiMulti;

ESP8266WebServer server(80);
WebSocketsServer webSocket = WebSocketsServer(81);

static const char PROGMEM INDEX_HTML[] = R"rawliteral(
<!DOCTYPE html>
<html>
<head>
<meta name = "viewport" content = "width = device-width, initial-scale = 1.0, maximum-scale = 1.0, user-scalable=0">
<title>ESP8266 WebSocket Demo</title>
<style>
"body { background-color: #808080; font-family: Arial, Helvetica, Sans-Serif; Color: #000000; }"
</style>
<script>
var websock;
function start() {
  websock = new WebSocket('ws://' + window.location.hostname + ':81/');
  websock.onopen = function(evt) { console.log('websock open'); };
  websock.onclose = function(evt) { console.log('websock close'); };
  websock.onerror = function(evt) { console.log(evt); };
  websock.onmessage = function(evt) {
    console.log(evt);
    var e = document.getElementById('ledstatus');
    if (evt.data === 'ledon') {
      e.style.color = 'red';
    }
    else if (evt.data === 'ledoff') {
      e.style.color = 'black';
    }
    else {
      console.log('unknown event');
    }
  };
}
function buttonclick(e) {
  websock.send(e.id);
}
</script>
</head>
<body onload="javascript:start();">
<h1>ESP8266 WebSocket Demo</h1>
<div id="ledstatus"><b>LED</b></div>
<button id="ledon"  type="button" onclick="buttonclick(this);">On</button>
<button id="ledoff" type="button" onclick="buttonclick(this);">Off</button>
</body>
</html>
)rawliteral";

// GPIO#0 is for Adafruit ESP8266 HUZZAH board. Your board LED might be on 13.
const int LEDPIN = D4;
// Current LED status
bool LEDStatus;

// Commands sent through Web Socket
const char LEDON[] = "ledon";
const char LEDOFF[] = "ledoff";

void webSocketEvent(uint8_t num, WStype_t type, uint8_t * payload, size_t length)
{
  Serial.printf("webSocketEvent(%d, %d, ...)\r\n", num, type);
  switch(type) {
    case WStype_DISCONNECTED:
      Serial.printf("[%u] Disconnected!\r\n", num);
      break;
    case WStype_CONNECTED:
      {
        IPAddress ip = webSocket.remoteIP(num);
        Serial.printf("[%u] Connected from %d.%d.%d.%d url: %s\r\n", num, ip[0], ip[1], ip[2], ip[3], payload);
        // Send the current LED status
        if (LEDStatus) {
          webSocket.sendTXT(num, LEDON, strlen(LEDON));
        }
        else {
          webSocket.sendTXT(num, LEDOFF, strlen(LEDOFF));
        }
      }
      break;
    case WStype_TEXT:
      Serial.printf("[%u] get Text: %s\r\n", num, payload);

      if (strcmp(LEDON, (const char *)payload) == 0) {
        writeLED(true);
      }
      else if (strcmp(LEDOFF, (const char *)payload) == 0) {
        writeLED(false);
      }
      else {
        Serial.println("Unknown command");
      }
      // send data to all connected clients
      webSocket.broadcastTXT(payload, length);
      break;
    case WStype_BIN:
      Serial.printf("[%u] get binary length: %u\r\n", num, length);
      hexdump(payload, length);

      // echo data back to browser
      webSocket.sendBIN(num, payload, length);
      break;
    default:
      Serial.printf("Invalid WStype [%d]\r\n", type);
      break;
  }
}

void handleRoot()
{
  server.send_P(200, "text/html", INDEX_HTML);
}

void handleNotFound()
{
  String message = "File Not Found\n\n";
  message += "URI: ";
  message += server.uri();
  message += "\nMethod: ";
  message += (server.method() == HTTP_GET)?"GET":"POST";
  message += "\nArguments: ";
  message += server.args();
  message += "\n";
  for (uint8_t i=0; i<server.args(); i++){
    message += " " + server.argName(i) + ": " + server.arg(i) + "\n";
  }
  server.send(404, "text/plain", message);
}

static void writeLED(bool LEDon)
{
  LEDStatus = LEDon;
  // Note inverted logic for Adafruit HUZZAH board
  if (LEDon) {
    digitalWrite(LEDPIN, 0);
  }
  else {
    digitalWrite(LEDPIN, 1);
  }
}

void setup()
{
  pinMode(LEDPIN, OUTPUT);
  writeLED(false);

  Serial.begin(115200);

  //Serial.setDebugOutput(true);

  Serial.println();
  Serial.println();
  Serial.println();

  for(uint8_t t = 4; t > 0; t--) {
    Serial.printf("[SETUP] BOOT WAIT %d...\r\n", t);
    Serial.flush();
    delay(1000);
  }

  WiFiMulti.addAP(ssid, password);

  while(WiFiMulti.run() != WL_CONNECTED) {
    Serial.print(".");
    delay(100);
  }

  Serial.println("");
  Serial.print("Connected to ");
  Serial.println(ssid);
  Serial.print("IP address: ");
  Serial.println(WiFi.localIP());

  if (mdns.begin("espWebSock", WiFi.localIP())) {
    Serial.println("MDNS responder started");
    mdns.addService("http", "tcp", 80);
    mdns.addService("ws", "tcp", 81);
  }
  else {
    Serial.println("MDNS.begin failed");
  }
  Serial.print("Connect to http://espWebSock.local or http://");
  Serial.println(WiFi.localIP());

  server.on("/", handleRoot);
  server.onNotFound(handleNotFound);

  server.begin();

  webSocket.begin();
  webSocket.onEvent(webSocketEvent);
}

void loop()
{
  webSocket.loop();
  server.handleClient();
}
Esta otra opción permite que el esp no sea visible por todo mundo, solo se tiene que estar conectado a la misma red que el esp y luego entrar a la ip en un en browser asignada por el esp para entrar.
/*
 * WebSocketServer_softAP
 **/

 #include <ESP8266WiFi.h>
#include <ESP8266WiFiMulti.h>
#include <WebSocketsServer.h>
#include <Hash.h>
#include <ESP8266WebServer.h>
#include <ESP8266mDNS.h>

#define USE_SERIAL Serial

static const char ssid[] = "-------";
static const char password[] = "---------";
MDNSResponder mdns;

static void writeLED(bool);

ESP8266WiFiMulti WiFiMulti;

ESP8266WebServer server(80);
WebSocketsServer webSocket = WebSocketsServer(81);

static const char PROGMEM INDEX_HTML[] = R"rawliteral(
<!DOCTYPE html>
<html>
<head>
<meta name = "viewport" content = "width = device-width, initial-scale = 1.0, maximum-scale = 1.0, user-scalable=0">
<title>ESP8266 WebSocket Demo</title>
<style>
"body { background-color: #808080; font-family: Arial, Helvetica, Sans-Serif; Color: #000000; }"
</style>
<script>
var websock;
function start() {
  websock = new WebSocket('ws://' + window.location.hostname + ':81/');
  websock.onopen = function(evt) { console.log('websock open'); };
  websock.onclose = function(evt) { console.log('websock close'); };
  websock.onerror = function(evt) { console.log(evt); };
  websock.onmessage = function(evt) {
    console.log(evt);
    var e = document.getElementById('ledstatus');
    if (evt.data === 'ledon') {
      e.style.color = 'red';
    }
    else if (evt.data === 'ledoff') {
      e.style.color = 'black';
    }
    else {
      console.log('unknown event');
    }
  };
}
function buttonclick(e) {
  websock.send(e.id);
}
</script>
</head>
<body onload="javascript:start();">
<h1>ESP8266 WebSocket Demo</h1>
<div id="ledstatus"><b>LED</b></div>
<button id="ledon"  type="button" onclick="buttonclick(this);">On</button>
<button id="ledoff" type="button" onclick="buttonclick(this);">Off</button>
</body>
</html>
)rawliteral";

// GPIO#0 is for Adafruit ESP8266 HUZZAH board. Your board LED might be on 13.
const int LEDPIN = D4;
// Current LED status
bool LEDStatus;

// Commands sent through Web Socket
const char LEDON[] = "ledon";
const char LEDOFF[] = "ledoff";

void webSocketEvent(uint8_t num, WStype_t type, uint8_t * payload, size_t length)
{
 USE_SERIAL.printf("webSocketEvent(%d, %d, ...)\r\n", num, type);
  switch (type) {
  case WStype_DISCONNECTED:
    USE_SERIAL.printf("[%u] Disconnected!\r\n", num);
    break;
  case WStype_CONNECTED:
  {
               IPAddress ip = webSocket.remoteIP(num);
               USE_SERIAL.printf("[%u] Connected from %d.%d.%d.%d url: %s\r\n", num, ip[0], ip[1], ip[2], ip[3], payload);
               // Send the current LED status
               if (LEDStatus) {
                 webSocket.sendTXT(num, LEDON, strlen(LEDON));
               }
               else {
                 webSocket.sendTXT(num, LEDOFF, strlen(LEDOFF));
               }
  }
    break;
  case WStype_TEXT:
    USE_SERIAL.printf("[%u] get Text: %s\r\n", num, payload);

    if (strcmp(LEDON, (const char *)payload) == 0) {
      writeLED(true);
    }
    else if (strcmp(LEDOFF, (const char *)payload) == 0) {
      writeLED(false);
    }
    else {
      USE_SERIAL.println("Unknown command");
    }
    // send data to all connected clients
    webSocket.broadcastTXT(payload, length);
    break;
  case WStype_BIN:
    USE_SERIAL.printf("[%u] get binary length: %u\r\n", num, length);
    hexdump(payload, length);

    // echo data back to browser
    webSocket.sendBIN(num, payload, length);
    break;
  default:
    USE_SERIAL.printf("Invalid WStype [%d]\r\n", type);
    break;
  }
}

void handleRoot()
{
  server.send_P(200, "text/html", INDEX_HTML);
}

void handleNotFound()
{
  String message = "File Not Found\n\n";
  message += "URI: ";
  message += server.uri();
  message += "\nMethod: ";
  message += (server.method() == HTTP_GET) ? "GET" : "POST";
  message += "\nArguments: ";
  message += server.args();
  message += "\n";
  for (uint8_t i = 0; i<server.args(); i++){
    message += " " + server.argName(i) + ": " + server.arg(i) + "\n";
  }
  server.send(404, "text/plain", message);
}

static void writeLED(bool LEDon)
{
  LEDStatus = LEDon;
  // Note inverted logic for Adafruit HUZZAH board
  if (LEDon) {
    digitalWrite(LEDPIN, 0);
  }
  else {
    digitalWrite(LEDPIN, 1);
  }
}

void setup()
{
  pinMode(LEDPIN, OUTPUT);
  writeLED(false);

  USE_SERIAL.begin(115200);

  //Serial.setDebugOutput(true);

  USE_SERIAL.println();
  USE_SERIAL.println();
  USE_SERIAL.println();

  for (uint8_t t = 4; t > 0; t--) {
    USE_SERIAL.printf("[SETUP] BOOT WAIT %d...\r\n", t);
    USE_SERIAL.flush();
    delay(1000);
  }

//  WiFiMulti.addAP(ssid, password);
//
//  while (WiFiMulti.run() != WL_CONNECTED) {
//    Serial.print(".");
//    delay(100);
//  }

  WiFi.softAP(ssid, password);
  IPAddress myIP = WiFi.softAPIP();
  USE_SERIAL.print("AP IP address: ");
  USE_SERIAL.println(myIP);

  USE_SERIAL.println("");
  USE_SERIAL.print("Connected to ");
  USE_SERIAL.println(ssid);
  USE_SERIAL.print("IP address: ");
  USE_SERIAL.println(WiFi.localIP());

  if (mdns.begin("espWebSock", WiFi.localIP())) {
    USE_SERIAL.println("MDNS responder started");
    mdns.addService("http", "tcp", 80);
    mdns.addService("ws", "tcp", 81);
  }
  else {
    USE_SERIAL.println("MDNS.begin failed");
  }
  USE_SERIAL.print("Connect to http://espWebSock.local or http://");
  USE_SERIAL.println(WiFi.localIP());

  server.on("/", handleRoot);
  server.onNotFound(handleNotFound);

  server.begin();

  webSocket.begin();
  webSocket.onEvent(webSocketEvent);
}

void loop()
{
  webSocket.loop();
  server.handleClient();
}
Código websocket para led RGB
Mas información acerca de este código: Enlace externo
Otros enlaces:
#include <ESP8266WiFi.h>
#include <WebSocketsServer.h>
#include <ESP8266WebServer.h>
#include <ESP8266mDNS.h>

#define LED_RED     05 // D1
#define LED_GREEN   12 // D6
#define LED_BLUE    13 // D7

const char* ssid = "-----";
const char* password = "-----";
int contconexion = 0;

String pagina ="<html>"
"<head>"
"<script>"
"var connection = new WebSocket('ws://'+location.hostname+':81/', ['arduino']);"
"connection.onopen = function ()       { connection.send('Connect ' + new Date()); };"
"connection.onerror = function (error) { console.log('WebSocket Error ', error);};"
"connection.onmessage = function (e)   { console.log('Server: ', e.data);};"
"function sendRGB() {"
" var r = parseInt(document.getElementById('r').value).toString(16);"
" var g = parseInt(document.getElementById('g').value).toString(16);"
" var b = parseInt(document.getElementById('b').value).toString(16);"
" if(r.length < 2) { r = '0' + r; }"
" if(g.length < 2) { g = '0' + g; }"
" if(b.length < 2) { b = '0' + b; }"
" var rgb = '#'+r+g+b;"
" console.log('RGB: ' + rgb);"
" connection.send(rgb);"
"}"
"</script>"
"</head>"
"<body>"
"LED Control:<br/><br/>"
"R: <input id='r' type='range' min='0' max='255' step='1' value='0' oninput='sendRGB();'/><br/>"
"G: <input id='g' type='range' min='0' max='255' step='1' value='0' oninput='sendRGB();'/><br/>"
"B: <input id='b' type='range' min='0' max='255' step='1' value='0'oninput='sendRGB();'/><br/>"
"</body>"
"</html>";

ESP8266WebServer server = ESP8266WebServer(80);
WebSocketsServer webSocket = WebSocketsServer(81);

void webSocketEvent(uint8_t num, WStype_t type, uint8_t * payload, size_t length) {

    switch(type) {
        case WStype_DISCONNECTED:
            Serial.printf("[%u] Disconnected!\n", num);
            break;
        case WStype_CONNECTED: {
            IPAddress ip = webSocket.remoteIP(num);
            Serial.printf("[%u] Connected from %d.%d.%d.%d url: %s\n", num, ip[0], ip[1], ip[2], ip[3], payload);

            // send message to client
            webSocket.sendTXT(num, "Connected");
        }
            break;
        case WStype_TEXT:
            Serial.printf("[%u] get Text: %s\n", num, payload);

            if(payload[0] == '#') {
                // we get RGB data

                // decode rgb data
                uint32_t rgb = (uint32_t) strtol((const char *) &payload[1], NULL, 16);

                analogWrite(LED_RED,    abs(255 - (rgb >> 16) & 0xFF) );
                analogWrite(LED_GREEN,  abs(255 - (rgb >>  8) & 0xFF) );
                analogWrite(LED_BLUE,   abs(255 - (rgb >>  0) & 0xFF) );
            }
            break;
    }
}

void setup() {

  Serial.begin(115200);
  Serial.println();

  WiFi.mode(WIFI_STA); //para que no inicie el SoftAP en el modo normal
  WiFi.begin(ssid, password);
  while (WiFi.status() != WL_CONNECTED and contconexion <50) { //Cuenta hasta 50 si no se puede conectar lo cancela
    ++contconexion;
    delay(500);
    Serial.print(".");
  }
  if (contconexion <50) {
      //para usar con ip fija
      IPAddress Ip(192,168,1,180);
      IPAddress Gateway(192,168,1,1);
      IPAddress Subnet(255,255,255,0);
      WiFi.config(Ip, Gateway, Subnet);

      Serial.println("");
      Serial.println("WiFi conectado");
      Serial.println(WiFi.localIP());
  }
  else {
      Serial.println("");
      Serial.println("Error de conexion");
  }

  pinMode(LED_RED, OUTPUT);
  pinMode(LED_GREEN, OUTPUT);
  pinMode(LED_BLUE, OUTPUT);

  // start webSocket server
  webSocket.begin();
  webSocket.onEvent(webSocketEvent);

  if(MDNS.begin("esp8266")) {
    Serial.println("MDNS responder started");
  }

  // handle index
  server.on("/", []() {
      server.send(200, "text/html", pagina);
  });

  server.begin();

  // Add service to MDNS
  MDNS.addService("http", "tcp", 80);
  MDNS.addService("ws", "tcp", 81);

  digitalWrite(LED_RED,   1); // 1 = apagado
  digitalWrite(LED_GREEN, 1);
  digitalWrite(LED_BLUE,  1);

  analogWriteRange(255);

}

void loop() {
    webSocket.loop();
    server.handleClient();
}
conectar ESp8266 a telegram
Para la configuración del bot debemos usar botfather y configurar nuestro bot usando este servicio. Mas información sobre la configuración aquí
pasos para configurar el bot
Cuando estemos con Botfather, podremos escribirle /mybots para que el bot nos diga si tenemos bots configurados. Como este es el primero, entonces el nos dirá que no tiene ninguno. Entonces paramos a escribir /newbot para decirle a Botfather que nos haga un nuevo bot. Seguidamente, Botfather nos dirá que le pongamos un nombre a ese bot, el nombre que le asignamos al nuestro bot fue alexander_bot (así sera como nuestro bot aparecerá en telegram cuando lo busquemos para chatearle). Cuando le pongamos el nombre, Botfather nos dirá esta todo listo!. Todos estos pasos se muestran en esta imagen
Después Botfather nos pedirá un nombre de usuario para nuestro bot () a mi me gusta llamarlo apodo), después de algunos intentos, el apodó para nuestro Bot es esp8266alexander_bot
Cuando tengamos el apodó para nuestro bot, Botfather nos felicitará diciendonos que nuestro bot ya esta listo para usarse. Nos dirá que hay que buscarlo con el nombre que le asignamos y ademas de eso nos brindará un token para usarlo en nuestro código. Tanto el apodo, el token y el nombre los necesitamos para usarlos mas tarde en nuestro código.
Los pasos anteriores se muestran en esta imagen
código telegram bot esp8266
Se usa esta librería para el telegram bot
#include <ESP8266TelegramBOT.h>
#include <ESP8266WiFi.h>
#include <WiFiClientSecure.h>

// Initialize Telegram BOT
// your Bot Token (Get from Botfather)
#define BOTtoken "----------"
#define BOTname "alexander_bot"
#define BOTusername "esp8266alexander_bot"

TelegramBOT bot(BOTtoken, BOTname, BOTusername);

int Bot_mtbs = 1000; //mean time between scan messages
long Bot_lasttime;   //last time messages' scan has been done
bool Start = false;

// Initialize Wifi connection to the router
char ssid[] = "-----";     // your network SSID (name)
char password[] = "-----"; // your network key

int el_reset = D2;

/********************************************
 * EchoMessages - function to Echo messages *
 ********************************************/
void Bot_ExecMessages() {
  for (int i = 1; i < bot.message[0][0].toInt() + 1; i++)      {
    bot.message[i][5]=bot.message[i][5].substring(1,bot.message[i][5].length());
    Serial.println("GOT MESSAGE " + bot.message[i][5]);
    if (bot.message[i][5] == "ledon") {
      digitalWrite(el_reset, LOW);   // turn the LED on (HIGH is the voltage level)
      bot.sendMessage(bot.message[i][4], "Prendiendo el Led", "");
    }
    if (bot.message[i][5] == "ledoff") {
      digitalWrite(el_reset, HIGH);    // turn the LED off (LOW is the voltage level)
      bot.sendMessage(bot.message[i][4], "Apagando el Led", "");
    }
    if (bot.message[i][5] == "reset") {
      digitalWrite(el_reset, LOW);    // turn the LED off (LOW is the voltage level)
      delay(1000);
      digitalWrite(el_reset, HIGH);    // turn the LED off (LOW is the voltage level)

      bot.sendMessage(bot.message[i][4], "Resetiando el esp", "");
    }

    if (bot.message[i][5] == "start") {
      String wellcome = "Wellcome from FlashLedBot, your personal Bot on ESP8266 board";
      String wellcome1 = "/ledon : to switch the Led ON";
      String wellcome2 = "/ledoff : to switch the Led OFF";
      String wellcome3 = "/reset : to make a resetting routine.";
      bot.sendMessage(bot.message[i][4], wellcome, "");
      bot.sendMessage(bot.message[i][4], wellcome1, "");
      bot.sendMessage(bot.message[i][4], wellcome2, "");
      bot.sendMessage(bot.message[i][4], wellcome3, "");
      Start = true;
    }
  }
  bot.message[0][0] = "";   // All messages have been replied - reset new messages
}

void setup(){

  Serial.begin(115200);

  // Set WiFi to station mode and disconnect from an AP if it was Previously
  // connected
  WiFi.mode(WIFI_STA);
  WiFi.disconnect();
  delay(100);

  // attempt to connect to Wifi network:
  Serial.print("Connecting Wifi: ");
  Serial.println(ssid);
  WiFi.begin(ssid, password);

  while (WiFi.status() != WL_CONNECTED) {
    Serial.print(".");
    delay(500);
  }

  Serial.println("");
  Serial.println("WiFi connected");
  Serial.print("IP address: ");
  Serial.println(WiFi.localIP());
  //
  bot.begin();      // launch Bot functionalities
  pinMode(el_reset,OUTPUT);
  delay(2);
  digitalWrite(el_reset, HIGH);

}

void loop(){


  if (millis() > Bot_lasttime + Bot_mtbs)  {
    bot.getUpdates(bot.message[0][1]);   // launch API GetUpdates up to xxx message
    Bot_ExecMessages();   // reply to message with Echo
    Bot_lasttime = millis();
  }

  /*
  digitalWrite(el_reset,LOW);
  delay(1000);
  digitalWrite(el_reset, HIGH);
  delay(1000);
*/
}
conexionado de algunos sensores
Conexión relevador
Se puede reemplazar el transistor de la imagen por un 2N2222 . para ensayar el Relay, se puede usar el código blink de arduino
Conexión DTH11
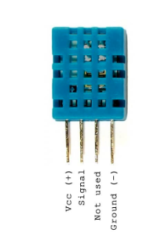
Este sensor es un sensor de temperatura y humedad en el aire.Toda la información para conectar el sensor en este link
Así conectamos el sensor al arduino o al esp. La resistencia tiene de que ser 10K
El código que necesitamos para leer los valores del sensor es este:
#include <dht.h>

dht DHT;

#define DHT11_PIN 7

void setup(){
  Serial.begin(9600);
}

void loop()
{
  int chk = DHT.read11(DHT11_PIN);
  Serial.print("Temperature = ");
  Serial.println(DHT.temperature);
  Serial.print("Humidity = ");
  Serial.println(DHT.humidity);
  delay(1000);
}
Conexión LM35
Aquí a toda la información. En este caso hemos optado por un sensor bastante normal que detecta temperaturas desde -55ºC a 150ºC, 1ºC equivale a 10mV y soporta voltajes de entre 4V y 30V. Todo esta información se ha obtenido de la ficha técnica del LM35.
/*
  Creado: Luis del Valle (ldelvalleh@programarfacil.com)
  https://programarfacil.com
*/

// Declaracion de variables globales
float tempC; // Variable para almacenar el valor obtenido del sensor (0 a 1023)
int pinLM35 = 0; // Variable del pin de entrada del sensor (A0)

void setup() {
  // Cambiamos referencia de las entradas analógicas
  analogReference(INTERNAL);

  // Configuramos el puerto serial a 9600 bps
  Serial.begin(9600);
}

void loop() {
  // Con analogRead leemos el sensor, recuerda que es un valor de 0 a 1023
  tempC = analogRead(pinLM35);

  // Calculamos la temperatura con la fórmula
  tempC = (1.1 * tempC * 100.0)/1024.0;

  // Envia el dato al puerto serial
  Serial.print(tempC);
  // Salto de línea
  Serial.print("\n");

  // Esperamos un tiempo para repetir el loop
  delay(1000);
}
Conexión pantalla oled SSD1306
Links con información interesante:
Este es el esquema de conexión:
Este código funciona con la librería de adafruit.
/*
 * Demo for SSD1306 based 128x64 OLED module using Adafruit SSD1306
 * library (https://github.com/adafruit/Adafruit_SSD1306).
 *
 * See https://github.com/pacodelgado/arduino/wiki/SSD1306-based-OLED-connected-to-Arduino
 * for more information.
 *
 */

#include <SPI.h>
#include <Wire.h>
#include <Adafruit_GFX.h>
#include <Adafruit_SSD1306.h>

// If using software SPI (the default case):
#define OLED_MOSI  11   //D1
#define OLED_CLK   12   //D0
#define OLED_DC    9
#define OLED_CS    8
#define OLED_RESET 10

Adafruit_SSD1306 display(OLED_MOSI, OLED_CLK, OLED_DC, OLED_RESET, OLED_CS);

void setup()   {
//  Serial.begin(9600);
  display.begin(SSD1306_SWITCHCAPVCC);
  display.display();
  delay(1000);
  display.clearDisplay();
  display.setTextSize(1);
  display.setTextColor(WHITE);
}

void loop()
{
  static unsigned long thisMicros = 0;
  static unsigned long lastMicros = 0;
  display.clearDisplay();
  display.setCursor(0,0);
  display.print("Now is the time for all good men to come to the aid the party \n");
  display.print("The quick brown fox jumps over a lazy dog \n");
  display.print(thisMicros - lastMicros);
  display.print(" microseconds");
  display.display();
  lastMicros = thisMicros;
  thisMicros = micros();
}


