¡Esta es una revisión vieja del documento!
Tabla de Contenidos
Indoor para autocultivo de marihuana

la idea principal de este indoor es que sea pueda estar pendiente de las necesidades básicas de las plantas y proporcionarlas mientras el dueño no esta.
Son los principales items que requieren las plantas son:
- Agua
- Luz
- Aire
- humedad y temperatura ideales en ambiente
- nutrientes
Materiales que se pueden explorar
Aquí se escribirán ideas sueltas para llevar a cabo, que a largo plazo; serán implementadas en el indoor.
Cómo envíar datos a influxdb de algún sensor
Firmware para el ESP8266
Parte del código se toma de acá
// Mirar los ejemplos de código que trae el dht adafruit sensor para entender lo concerniente al dht11

#include "DHT.h"
#include <ESP8266HTTPClient.h>
#include <ESP8266Wifi.h>

#define DHTPIN D5 // Pin que va conectado al sensor
#define DHTTYPE DHT11 // Tipo de sensor que estamos usando
#define HTTP_TIMEOUT 1000 * 60 // cada minuto

DHT dht(DHTPIN, DHTTYPE);

void setup() {
  Serial.begin(115200);
  Serial.println(F("DHTxx test!"));
  dht.begin();
  // nombre del wifi y clave del wifi al cual se va a conectar el esp
  WiFi.begin("name wifi", "wifi password");

  while (WiFi.status() != WL_CONNECTED) {
    delay(500);
    Serial.print(".");
  }
  Serial.println("connection successfull !");
}

// función que prepara la trama de datos para hacer un POST a endpoint del influx
String influxFrame( String dht11_humidity, String dht11_temperature ) {
  // este es el nombre del sensor
  // Siempre que se quema la primera vez, se debe de cambiar el nombre del sensor
  const String SENSOR_ID = "DHT11_llanadas"; // Nombre del sensor en la plataforma

  const String STR_COMMA = ",";
  const String STR_SLASH = "/";
  const String STR_DOT = ".";
  const String STR_COLON = ":";
  const String STR_NULL = "NULL";
  const String STR_ZERO = "0";
  const String STR_SPACE = " ";

  // El primer dato en el squema de la DB es el id del sensor
  String frame = SENSOR_ID + STR_COMMA + "id=" + SENSOR_ID +  STR_SPACE;

  // Add GPS data
  frame += "lat=";
  frame += "6.2563143" + STR_COMMA; // coordenada GSP lat
  frame += "lng=";
  frame += "-75.5386472" + STR_COMMA; // coordenada lng lat
  frame += "altitude=";
  frame += STR_ZERO + STR_COMMA;
  frame += "course=";
  frame += STR_ZERO + STR_COMMA;
  frame += "speed=";
  frame += STR_ZERO + STR_COMMA;

  //Add DHT11 data
  //if
    frame += "humidity=";
    frame += dht11_humidity + STR_COMMA;
    frame += "temperature=";
    frame += dht11_temperature + STR_COMMA;
  // } else {
  //   frame += "humidity=" + STR_NULL + STR_COMMA + "temperature=" + STR_NULL + STR_COMMA;
  // }

  // Add Plantower data
    // if
    frame += "pm1=";
    frame += STR_ZERO + STR_COMMA;
    frame += "pm25=";
    frame += STR_ZERO + STR_COMMA;
    frame += "pm10=";
    frame += STR_ZERO;
  // } else {
  //   frame += "pm1=" + STR_NULL + STR_COMMA + "pm25=" + STR_NULL + STR_COMMA + "pm10=" + STR_NULL;
  // }

  return frame;
}

// función que envía la trama de datos
void sendDataInflux ( String humidity, String temperature ) {
  /*
  El post a la base de datos tiene una trama siguiente:
  // volker0001,id=volker0001 lat=6.268115,lng=-75.543407,altitude=1801.1,course=105.55,speed=0.00,humidity=37.00,temperature=25.00,pm1=22,pm25=31,pm10=32
  Para nuestro caso que SOLO es el envío de datos del dht_11 que es humedad y temperatura la trama es la siguiente
  // DHT11_llanadas, id=DHT11_llanadas, lat=6.2563143, lng=-75.5386472, altitude=0, course=0, speed=0, humidity=37.00, temperature=25.00, pm1=0, pm25=0, pm10=0 1434055562000000000
  */

  HTTPClient http;
  // _testsensorhumedad es el nombre de la DB donde se almacenan estos datos
  http.begin("http://aqa.unloquer.org:8086/write?db=_testsensorhumedad"); // endPoint final, '_testsensorhumedad' es el nombre de la base de datos
  http.setTimeout(HTTP_TIMEOUT);
  http.addHeader("Content-Type", "--data-binary");

  String frame = influxFrame(humidity, temperature); // Construimos el request POST

  int httpCode = http.POST(frame); // Envíamos los datos haciendo un POST

  if(httpCode > 0) {
    String payload = http.getString();
    Serial.println(payload);
    Serial.println("Envío de datos con exito!");
  } else {
    Serial.print("[HTTP] failed, error;");
    Serial.println(http.errorToString(httpCode).c_str());
  }

  http.end();
  delay(60000); // cada minuto se envía un POST al influx
}

void loop() {
  // esperamos 5 segundos entre lecturas y lectura
  // El sensor de humedad o temperatura toma alrededor de 250 milisegundos
  // o hasta dos segundos entre lectura y lectura. Es un sensor muy lento
  // por eso se añade este de 2000
  delay(2000);

  float h = dht.readHumidity(); // leemos la temperatura en grados celcius (Esta es la default del sensor)
  float t = dht.readTemperature();
  float f = dht.readTemperature(true); // Si queremos la temperatura en fahrenheit, ponemos este en true

  // Si las lecturas fallan, salimos, no mandamos nada y volvemos a intentarlo
  if (isnan(h) || isnan(t) || isnan(f)) {
    Serial.println(F("Failed to read from DHT sensor!"));
    return;
  }

  // Compute heat index in Fahrenheit (the default)
  //float hif = dht.computeHeatIndex(f, h);
  // Compute heat index in Celsius (isFahreheit = false)
  //float hic = dht.computeHeatIndex(t, h, false);

  // Serial.print(F("Lectura Humidity: "));
  // Serial.print(h);
  // Serial.print(F("% Lectura Temperature: "));
  // Serial.print(t);
  // Serial.print("\n");

  /*
  Serial.print(f);
  Serial.print(F("°F  Heat index: "));
  Serial.print(hic);
  Serial.print(F("°C "));
  Serial.print(hif);
  Serial.println(F("°F"));
  */

  sendDataInflux(String(h), String(t));
}
Configuración de plataforma
- Se crea una base de datos
documentar esta parte de como crear base de datos y adjuntar al dashboard para ver los graficos enviados por algún sensor
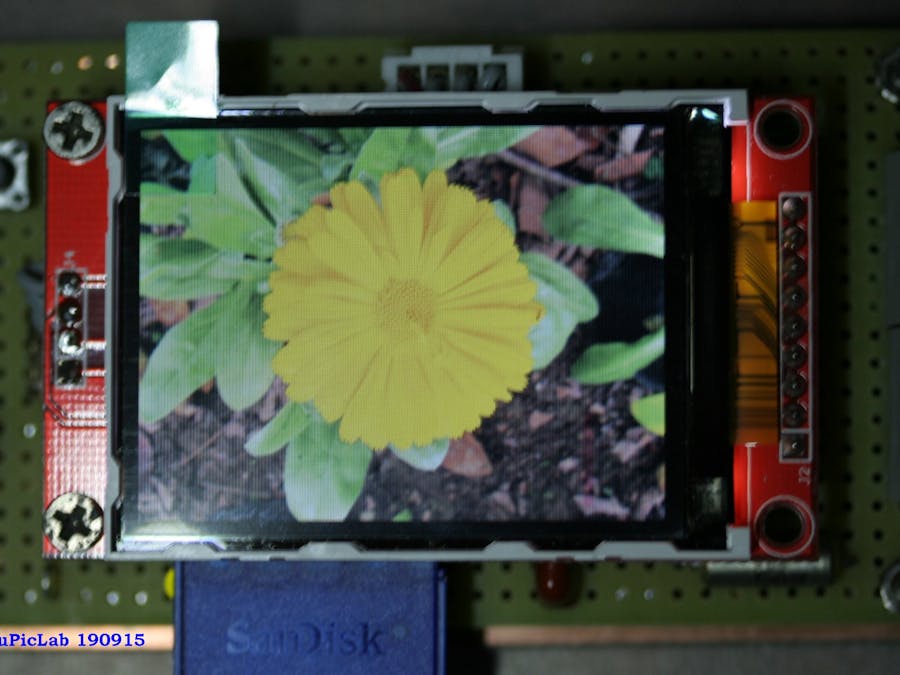
primer prototipo de control automatico


Se intenta manipular relays, mosttar datos en pantallay enviar datos a una base de datos influxdb
A ESTE CÖDIGO FALTA IMPLEMENTAR ENVIO DE DATOS AL INFLUX CON WEBSOCKETS.
Construcción física del indoor
Código para la ventilación usando timeAlarms
// https://github.com/PaulStoffregen/TimeAlarms
// Librerias
#include <Time.h>
#include <TimeAlarms.h>

// pin que controla
int pin = 13;

int alarma = 900; // cada 15 min

void setup() {

  Serial.begin(9600);
  //fijamos el tiempo inicial del esp
  // (08:30:00 25/05/17)
  setTime(8,10,0,28,5,19);

  //Creamos las alarmas
  //Alarm.alarmRepeat(8,init15,0,EveningAlarm); Alarma que se inicia cada día
  //Alarm.alarmRepeat(8,end15,0,apagarVentilador);  Alarma que termina cada día

  Alarm.timerRepeat(alarma, Repeats); // Timer cada 15 segundos

  //Alarm.alarmRepeat(17,45,0,EveningAlarm); 5:45pm cada día
  //Alarm.alarmRepeat(dowSaturday,8,30,30,WeeklyAlarm); 8:30:30 cada sabado
  //Alarm.timerRepeat(alarma, Repeats); Timer cada 15 segundos
  //Alarm.timerOnce(10, OnceOnly);  Llamado una vez despues de 10 segundos

  pinMode(pin, OUTPUT);
}

void loop() {
  digitalClockDisplay();
  Alarm.delay(1000);
}

// encender ventilador
void prenderVentilador(){
  Serial.println("Ventilando");
  digitalWrite(pin, HIGH);
}


// encender ventilador
void apagarVentilador(){
  Serial.println("apagando ventilador");
  digitalWrite(pin, LOW);
}

// función que enciende el riego
void prenderSensorRiegoManana(){
  Serial.println("Alarm: - Sensor encendido y regando");
  digitalWrite(pin, HIGH);
}

// función que apaga el riego
void apagarSensorRiegoManana(){
  Serial.println("Alarm: - Sensor apagado y riego apagado");
  digitalWrite(pin, LOW);
}

void EveningAlarm(){
  Serial.println("Alarm: - turn lights on");
}

void WeeklyAlarm(){
  Serial.println("Alarm: - its Monday Morning");
}

void ExplicitAlarm(){
  Serial.println("Alarm: - this triggers only at the given date and time");
}

void Repeats(){
  digitalWrite(pin, HIGH);
  Alarm.delay(60000);
  Serial.println("ventilando x un minuto");
  digitalWrite(pin, LOW);
  Alarm.delay(1000);
  Serial.println("apagando ventilador");
}

void OnceOnly(){
  Serial.println("This timer only triggers once");
}

void digitalClockDisplay()
{
  // digital clock display of the time
  Serial.print(hour());
  printDigits(minute());
  printDigits(second());
  Serial.println();
}

void printDigits(int digits)
{
  Serial.print(":");
  if(digits < 10)
  Serial.print('0');
  Serial.print(digits);
}
Código para el control automatizado de las luces
Este código posee dos funciones que segun el estado se la planta se pueden cambiar para vegetativo o floración. Es un proyecto en platformio
/*
  Este código toma la hora de internet usando un servidor NTP y
  enciende algo. Tomadpo de aqui https://lastminuteengineers.com/esp8266-ntp-server-date-time-tutorial/

  !!! importante
  You need to adjust the UTC offset for your timezone in milliseconds.
  Refer the list of UTC time offsets.  Here are some examples for different timezones:
  https://upload.wikimedia.org/wikipedia/commons/8/88/World_Time_Zones_Map.png

  For UTC -5.00 : -5 * 60 * 60 : -18000
  For UTC +1.00 : 1 * 60 * 60 : 3600
  For UTC +0.00 : 0 * 60 * 60 : 0

  here -> const long utcOffsetInSeconds = 3600;
*/
#include <Arduino.h>
#include <NTPClient.h>
#include <ESP8266WiFi.h>
#include <WiFiUdp.h>

const char *ssid = "el nombre de la red";
const char *password = "el password de la red";
const long utcOffsetInSeconds = -18000; // colombia UTC -5
char daysOfTheWeek[7][12] = {
  "Sunday", "Monday", "Tuesday", "Wednesday", "Thursday", "Friday", "Saturday"
};
// Define NTP client to get time
WiFiUDP ntpUDP;
NTPClient timeClient(ntpUDP, "pool.ntp.org", utcOffsetInSeconds);
int ledTrigger = D6;

void setup() {
  Serial.begin(115200);
  WiFi.begin(ssid, password);
  while(WiFi.status() != WL_CONNECTED) {
    delay(500);
    Serial.print(".");
  }
  Serial.print("Wifi connected!");
  Serial.println("IP address: ");
  Serial.println(WiFi.localIP());
  timeClient.begin();
  pinMode(LED_BUILTIN, OUTPUT);
  pinMode(ledTrigger, OUTPUT);
}

void statusWIFI() {
  // cuando esta pegado a internet el status es 3
  // la idea de esto es que mande un color u otro si tiene internet o no
  Serial.print("Estatus wifi is: ");
  Serial.println(WiFi.status());
}

void lucesVegetativo() {
  // 18 horas luz, 6 horas oscuridad
  int hours = timeClient.getHours();
  //  se prenden a las 6 de la mañana y se apagan a las 12 de la noche
  if ( hours < 6 ) {
    digitalWrite(ledTrigger, LOW);
    Serial.println("Luces OFF!");
  } else {
    digitalWrite(ledTrigger, HIGH);
    Serial.println("Luces ONN!");
  }
}

void lucesFloracion() {
  // 12 horas luz, 12 horas oscuridad
  int hours = timeClient.getHours();
  //  a las 6 de la mañana se prenden y a las 6 de la tarde se apagan
  if ( (hours >= 6) && (hours < 18) ) {
    digitalWrite(ledTrigger, HIGH);
    Serial.println("Luces ONN!");
  } else {
    digitalWrite(ledTrigger, LOW);
    Serial.println("Luces OFF");
  }
}

// the loop function runs over and over again forever
void loop() {
  timeClient.update();
  Serial.print(daysOfTheWeek[timeClient.getDay()]);
  Serial.print(", ");
  Serial.print(timeClient.getHours());
  Serial.print(":");
  Serial.print(timeClient.getMinutes());
  Serial.print(":");
  Serial.print(timeClient.getSeconds());
  Serial.println("");
  statusWIFI();
  //lucesVegetativo();
  lucesFloracion();
  delay(1000);

  /*
  digitalWrite(LED_BUILTIN, HIGH);   // turn the LED on (HIGH is the voltage level)}
  digitalWrite(ledTrigger, HIGH);
  delay(1000);                       // wait for a second
  digitalWrite(LED_BUILTIN, LOW);    // turn the LED off by making the voltage LOW
  digitalWrite(ledTrigger, LOW);
  delay(1000);                       // wait for a second
  */
}
el platformio.ini
;PlatformIO Project Configuration File
;
;   Build options: build flags, source filter
;   Upload options: custom upload port, speed and extra flags
;   Library options: dependencies, extra library storages
;   Advanced options: extra scripting
;
; Please visit documentation for the other options and examples
; https://docs.platformio.org/page/projectconf.html

[env:d1_mini_lite]
platform = espressif8266
board = d1_mini_lite
framework = arduino
lib_deps = NTPClient
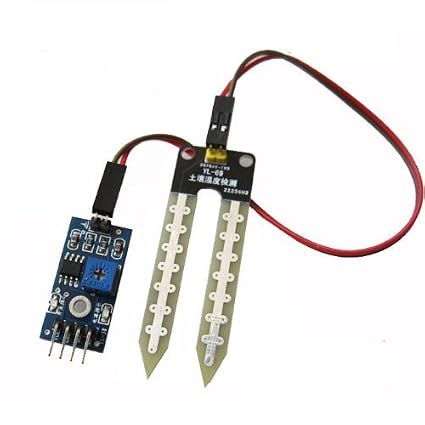
control de humedad y temperatura
Se inicia de aqui conectar sensor de humedad capacitivo


#include <Arduino.h>

int sensorPin = A0;    // select the input pin for the potentiometer
int ledPin = D4;      // select the pin for the LED
int sensorValue = 0;  // variable to store the value coming from the sensor

void setup() {
  // declare the ledPin as an OUTPUT:
  pinMode(ledPin, OUTPUT);
  Serial.begin(115200);
}

void loop() {
  // read the value from the sensor:
  sensorValue = analogRead(sensorPin);
  Serial.println(sensorValue);
  // turn the ledPin on
  digitalWrite(ledPin, HIGH);
  // stop the program for <sensorValue> milliseconds:
  delay(sensorValue);
  // turn the ledPin off:
  digitalWrite(ledPin, LOW);
  // stop the program for for <sensorValue> milliseconds:
  delay(sensorValue);
}
Sensor totalmente seco: 833 Sensor totalmente humedo: 482
actualizacion nov 3 2019
He creado una nueva versión del modulo que contiene un capacitive moisture sensor para medir la humedad en la tierra, un module relay x 4 para controlar las luces y la ventilación. Para el ciclo solar de las luces estoy usando la libreria time.h, me di cuenta que es mejor usar sin el timeAlarms.h porque se pueden customizar mejor los ciclos de la luz y es mejor, o hasta ahora me funciona a mi asi.


Mi abuelo me ha ayudado en la creación del indoor, una estructura de 90cm x 90cm x 1.5m. En su interior he añadido el DHT11 para “medir” la temperatura y humedad interna del lugar. Y a la planta mas grande he anclado en la tierra el sensor capcitivo.


/* Librerias usadas
 * https://github.com/PaulStoffregen/Time
 * https://github.com/PaulStoffregen/TimeAlarms
 * https://learn.adafruit.com/dht/using-a-dhtxx-sensor
 *
 * Recursos
 * https://www.switchdoc.com/2018/11/tutorial-capacitive-moisture-sensor-grove/
*/

// import libraries
#include <DHT.h>
#include <DHT_U.h>
#include <Time.h>
#include <SPI.h>
#include <Wire.h>
#include <Adafruit_GFX.h>
#include <Adafruit_SSD1306.h>
#include <ESP8266HTTPClient.h>
#include <ESP8266WiFi.h>

// defines and variables globals sensors
// dth11
#define DHTPIN 4 // D2
#define DHTTYPE DHT11

#define HTTP_TIMEOUT 1000 * 60

// screen oled
#define OLED_MOSI 14  // D5
#define OLED_CLK 16   // D0
#define OLED_DC 13    // D7
#define OLED_RESET 12 // D6
#define OLED_CS 15    // D8

#define HTTP_TIMEOUT 1000 * 60 // cada minuto

// lights- relay IN4
int lights = 2;

// ventilador - relay IN3
int air = 0;

// capacitive sensor
const int waterValue = 464;
int soilMoistureValue = 0;

Adafruit_SSD1306 display(OLED_MOSI, OLED_CLK, OLED_DC, OLED_RESET, OLED_CS);
DHT dht(DHTPIN, DHTTYPE);

void setup() {
  Serial.begin(115200);
  display.begin(SSD1306_SWITCHCAPVCC);
  display.clearDisplay();
  display.setTextSize(0.5);
  display.setTextColor(WHITE);
  display.setCursor(0,0);
  Serial.println();
  Serial.println();
  //
  for(uint8_t t = 4; t > 0; t--) {
    Serial.printf("[SETUP] BOOT WAIT %d...\r\n", t);
    Serial.flush();
    delay(1000);
  }
  //
  display.setTextColor(WHITE);
  display.setCursor(0,10);
  WiFi.begin(ssid, pass);
  while (WiFi.status() != WL_CONNECTED) {
    delay(500);
    display.println("UN/LOQUER - cultiva");
    display.print(".");
  }
  display.println("Conectado a internet!");
  display.display();
  delay(3000);
  // H, M, S, D, M, A
  setTime(12,06,0,9,11,19);
  pinMode(lights, OUTPUT);
  pinMode(air, OUTPUT);
  dht.begin();
}

void loop() {
  display.clearDisplay();
  display.setTextSize(0.5);
  display.setTextColor(WHITE);
  display.setCursor(0,0);
  display.print("time: ");
  display.print(hour());
  display.print(":");
  display.print(minute());
  display.print(":");
  display.print(second());
  display.print(" ");
  display.setCursor(0,8);
  // display alarms lights state
  lucesFloracion();
  // display capacitive himudity
  display.setCursor(0,16);
  soilMoistureValue = analogRead(A0);
  display.print("Soil moisture: ");
  display.println(soilMoistureValue);
  delay(500);
  // display dht sensor
  display.setCursor(0,24);
  int h = dht.readHumidity();
  int t = dht.readTemperature();
  if (isnan(h) || isnan(t)) {
    display.println(F("Failed read dht!"));
    return;
  }
  display.print(F("Hum: "));
  display.print(h);
  display.print(F(" %  Tem: "));
  display.print(t);
  display.print(F(" C "));
  display.println("");
  // run air at inddor
  ventilacion();
  display.display();
  sendDataInflux(String(h), String(t), String(soilMoistureValue));
}

void lucesVegetativo() {
  // 18 horas luz, 6 horas oscuridad
  // se prenden a las 6 de la mañana y se apagan a las 12 de la noche
  if ( hour() < 6 ) {
    digitalWrite(lights, LOW);
    display.println("Veget Light OFF!");
  } else {
    digitalWrite(lights, HIGH);
    display.println("Veget Light ONN!");
  }
}

void lucesFloracion() {
  // 12 horas luz, 12 horas oscuridad
  //  a las 6 de la mañana se prenden y a las 6 de la tarde se apagan
  if ( (hour() >= 6) && (hour() < 18) ) {
    digitalWrite(lights, HIGH);
    display.println("Flor Light ONN!");
  } else {
    digitalWrite(lights, LOW);
    display.println("Flor Light OFF");
  }
}

void ventilacion() {
  // se prende cada 15 min 1 min
  if ( (minute() == 1) || (minute() == 16) || (minute() == 46) || (minute() == 31) ) {
    digitalWrite(air, HIGH);
  } else {
    digitalWrite(air, LOW);
  }
}

String influxFrame( String dht11_humidity, String dht11_temperature, String soilCapacitiveSensor) {
  const String SENSOR_ID = "DHT11_llanadas"; // Nombre del sensor en la plataforma, la 1 VEZ CAMBIAR !!!!
  const String STR_COMMA = ",";
  const String STR_SLASH = "/";
  const String STR_DOT = ".";
  const String STR_COLON = ":";
  const String STR_NULL = "NULL";
  const String STR_ZERO = "0";
  const String STR_SPACE = " ";

  // El primer dato en el squema de la DB es el id del sensor
  String frame = SENSOR_ID + STR_COMMA + "id=" + SENSOR_ID +  STR_SPACE;

  // Add GPS data
  frame += "lat=";
  frame += "6.2563143" + STR_COMMA; // coordenada GSP lat
  frame += "lng=";
  frame += "-75.5386472" + STR_COMMA; // coordenada lng lat
  frame += "altitude=";
  frame += STR_ZERO + STR_COMMA;
  frame += "course=";
  frame += STR_ZERO + STR_COMMA;
  frame += "speed=";
  frame += STR_ZERO + STR_COMMA;

  //Add DHT11 data
  //if
    frame += "humidity=";
    frame += dht11_humidity + STR_COMMA;
    frame += "temperature=";
    frame += dht11_temperature + STR_COMMA;
  // } else {
  //   frame += "humidity=" + STR_NULL + STR_COMMA + "temperature=" + STR_NULL + STR_COMMA;
  // }

  // ADD capacitive sensor data
  // frame += "soil_capacitive=";
  // frame += soilCapacitiveSensor + STR_COMMA;

  // Add Plantower data
    // if
    frame += "pm1=";
    frame += STR_ZERO + STR_COMMA;
    frame += "pm25=";
    frame += STR_ZERO + STR_COMMA;
    frame += "pm10=";
    frame += STR_ZERO;
  // } else {
  //   frame += "pm1=" + STR_NULL + STR_COMMA + "pm25=" + STR_NULL + STR_COMMA + "pm10=" + STR_NULL;
  // }

  return frame;
}

// función que envía la trama de datos
void sendDataInflux ( String humidity, String temperature, String _soilCapacitiveSensor ) {
  // El post a la base de datos tiene una trama siguiente:
  // volker0001,id=volker0001 lat=6.268115,lng=-75.543407,altitude=1801.1,course=105.55,speed=0.00,humidity=37.00,temperature=25.00,pm1=22,pm25=31,pm10=32
  // Para nuestro caso que SOLO es el envío de datos del dht_11 que es humedad y temperatura la trama es la siguiente
  // DHT11_llanadas, id=DHT11_llanadas, lat=6.2563143, lng=-75.5386472, altitude=0, course=0, speed=0, humidity=37.00, temperature=25.00, pm1=0, pm25=0, pm10=0 1434055562000000000
 if(WiFi.status() == 3) {
    HTTPClient http;
    // _testsensorhumedad es el nombre de la DB donde se almacenan estos datos
    http.begin("http://aqa.unloquer.org:8086/write?db=_testsensorhumedad"); // endPoint final, '_testsensorhumedad' es el nombre de la base de datos
    http.setTimeout(HTTP_TIMEOUT);
    http.addHeader("Content-Type", "--data-binary");

    // esto se debe de integrar con el soil capacitive sensor
    // String frame = influxFrame(humidity, temperature, _soilCapacitiveSensor); // Construimos el request POST
    String frame = influxFrame(humidity, temperature, _soilCapacitiveSensor);

    int httpCode = http.POST(frame); // Envíamos los datos haciendo un POST

    if(httpCode > 0) {
      String payload = http.getString();
      Serial.println(payload);
      Serial.println("Envío de datos con exito!");
    } else {
      Serial.print("[HTTP] failed, error;");
      Serial.println(http.errorToString(httpCode).c_str());
    }
     http.end();
    }
    delay(60000);
}
Actualización nov 9 2019
Hasta ahora la libreria time.h a funcionado muy bien, reemplazandome por completo un rtc.
Los datos se puede ver en: Enlace al influx
Tareas que faltan por hacer!!!
- Íntegrar el envío de datos al influx los datos del capacitive sensor PRIORIDAD!!!
- integrar una web en la flash para programar la fecha del rtc digital time.h, (integrar esa parte que necesito de upayakuwasi y las alarmas)
- pensar en una interfaz para pedir al usuario la programacion de la luz sea floración o vegetación o esquejes.